
In Part 3 of this series, we covered how to set up your headless CMS and structure a content model that scales. Now comes the part where it all comes together — pulling that content into your frontend and rendering it for real users.
This is where the decoupled nature of headless architecture really pays off. Your frontend is entirely yours: you choose the framework, you control the rendering, and you decide exactly how content is fetched, transformed, and displayed. But with that freedom comes a set of decisions worth getting right from the start.
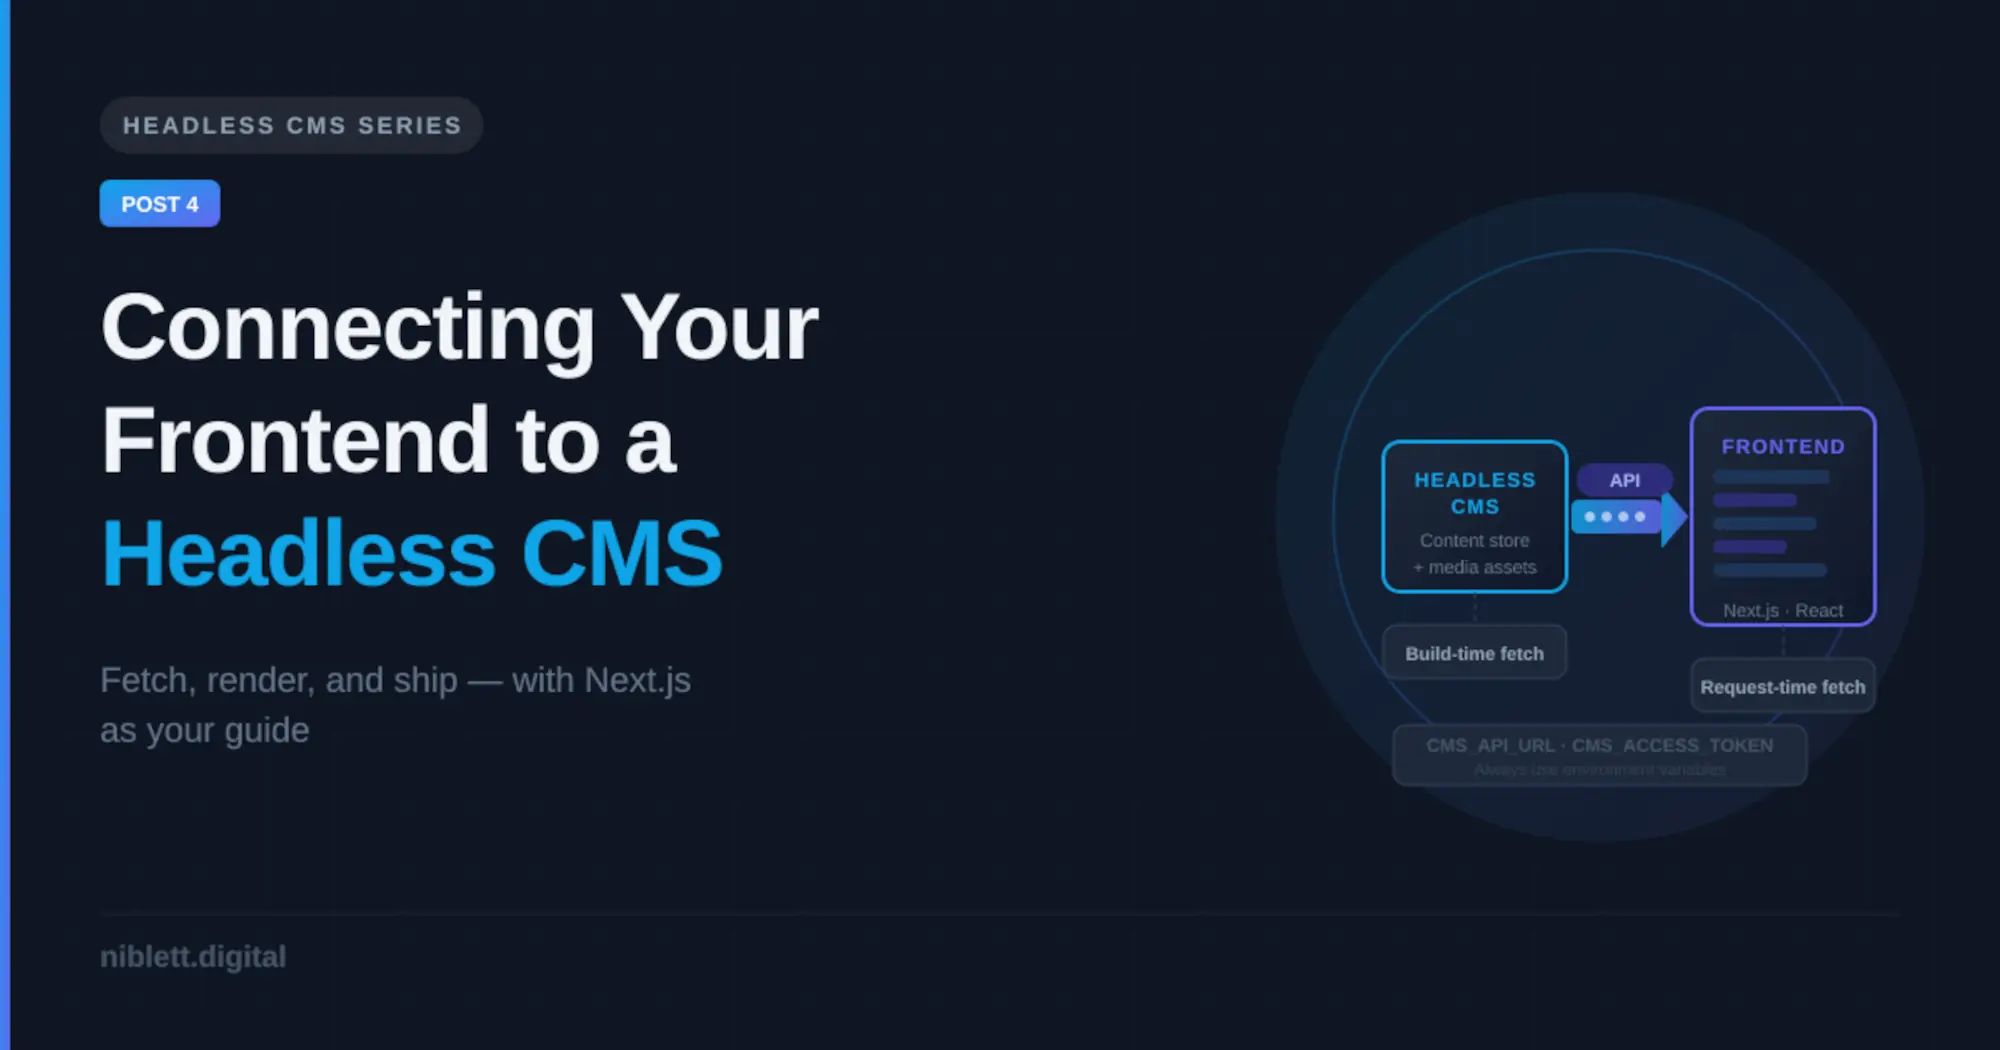
How Frontend Fetching Works
When your frontend needs content, it makes an API request to your CMS — either at build time or at request time. Understanding the difference matters, because it shapes your performance characteristics, your deployment model, and how up-to-date your content is.
Static (build-time) fetching — Your frontend fetches all content from the CMS when the site is built, generates static HTML pages, and serves those pages from a CDN. The result is extremely fast page loads and minimal server overhead. The trade-off is that content changes only go live when you trigger a new build — though most headless CMS platforms support webhooks that can trigger automatic rebuilds when content is published.
Dynamic (request-time) fetching — Content is fetched from the CMS API each time a user requests a page. This means content is always up-to-date, but it introduces latency and puts more load on both your server and your CMS API. This approach makes sense for personalised content, frequently changing data, or pages where real-time accuracy matters.
In practice, most projects use a hybrid approach: statically generate the majority of pages at build time, and use dynamic fetching only where freshness is genuinely required.
Setting Up Your API Connection
Before writing any fetch logic, get your environment configured correctly. This is the same regardless of which CMS you’re using:
1. Store credentials in environment variables. Your CMS API endpoint and access token should never be hardcoded. Add them to a .env.local file (for Next.js) or your platform’s equivalent:
  CMS_API_URL=https://your-cms-api-endpoint.com
  CMS_ACCESS_TOKEN=your-read-only-token-here
2. Install your CMS SDK. Most platforms publish official JavaScript/TypeScript SDKs. Install the relevant package:
# Contentful
npm install contentful

# Sanity
npm install @sanity/client

# Strapi (no official SDK — use fetch or axios)

# Payload
npm install payload
3. Create a shared client file. Rather than configuring your CMS connection in every file that needs data, create a single client module and import it wherever you need it:
// lib/cms.ts
import { createClient } from 'contentful'

export const cmsClient = createClient({
  space: process.env.CMS_SPACE_ID!,
  accessToken: process.env.CMS_ACCESS_TOKEN!,
})
This keeps your credentials and client configuration in one place and makes it easy to swap out your CMS later if needed.
Fetching Content in Next.js
Next.js is one of the most common frontend choices for headless CMS projects, so it’s worth walking through how content fetching works there specifically.
In Next.js App Router (the current standard), you fetch data directly inside Server Components using async/await:
// app/blog/page.tsx
import { cmsClient } from '@/lib/cms'

export default async function BlogPage() {
  const entries = await cmsClient.getEntries({ content_type: 'blogPost' })

  return (
    <ul>
      {entries.items.map((post) => (
        <li key={post.sys.id}>{post.fields.title}</li>
      ))}
    </ul>
  )
}
Because this runs on the server at request time (or at build time when using static generation), your CMS credentials are never exposed to the browser. This is one of the reasons Next.js pairs so well with headless CMS — the server/client boundary handles the security concern cleanly.
For static generation, add export const revalidate = 3600 at the top of your page file to cache the content and revalidate it every hour, or set it to false to fully static-generate the page at build time.
Rendering Rich Text and Media
Two content field types need special handling on the frontend: rich text and images.
Rich text fields don’t return plain HTML — they return a structured document format (the exact format varies by platform). You can’t just drop this into a dangerouslySetInnerHTML call and call it done. Most CMS platforms provide a renderer package for this:
- Contentful:
@contentful/rich-text-react-renderer - Sanity:
@portabletext/react - Payload: ships with a Lexical rich text editor; use the
@payloadcms/richtext-lexicalconverter
These renderers let you map each node type to your own React components, giving you full control over how headings, links, images, and embedded entries are rendered — which is exactly what you want.
Images should always be served through an optimisation layer. In Next.js, wrap your CMS image URLs in the built-in <Image> component:
import Image from 'next/image'

<Image
  src={`https:${post.fields.featuredImage.fields.file.url}`}
  alt={post.fields.featuredImage.fields.description}
  width={1200}
  height={630}
/>
Structuring Components Around Your Content Model
One of the biggest benefits of a well-designed content model is that it maps cleanly to your frontend component tree. If you modeled your content well in Part 3, this part should feel natural.
The principle is simple: one content type, one component. A BlogPost content type gets a BlogPost component. An Author type gets an Author component. A CallToAction type gets a CallToAction component.
This keeps your components focused, your data dependencies explicit, and your codebase easy to navigate. When a content type changes in the CMS, you know exactly which component to update.
For modular page builders — where editors compose pages from a set of reusable blocks — use a top-level renderer that maps block types to components:
const blockComponents = {
  hero: HeroBlock,
  featureList: FeatureListBlock,
  testimonial: TestimonialBlock,
  callToAction: CallToActionBlock,
}

export function PageBuilder({ blocks }) {
  return blocks.map((block) => {
    const Component = blockComponents[block.type]
    return Component ?  : null
  })
}
This pattern is flexible, extensible, and keeps your rendering logic clean regardless of how many block types you add over time.
Handling Preview Mode
Most headless CMS platforms offer a draft or preview API that returns unpublished content. Wiring this up lets editors preview exactly how their content will look before hitting publish — which is especially important when your frontend controls the presentation.
In Next.js, this is handled through Draft Mode. Your CMS typically provides a preview URL configuration where you point to a /api/preview route in your app. That route enables Draft Mode and redirects to the relevant page, which then fetches from the preview API instead of the published API.
It’s a few hours of setup work, but editors will thank you — without it, they’re publishing blind.
What’s Next
With your frontend connected and content rendering correctly, the final piece is going live and keeping your headless stack healthy over time. In Part 5, we’ll cover deployment, SEO in a headless context, the gotchas that catch teams off guard, and an honest look at when headless isn’t actually the right choice.
This is Part 4 of a 5-part series on building with a Headless CMS.

