
In Part 2 of this series, we walked through the leading headless CMS platforms and how to choose the right one for your project. Now it’s time to get into the build — and the first real decision you’ll face isn’t which framework to connect, or how to configure your API. It’s how to structure your content.
Getting set up in a headless CMS is usually straightforward. Getting your content model right is where most teams stumble — and the decisions you make at this stage affect everything downstream: your API responses, your frontend components, your editor workflow, and your ability to scale without rewriting everything six months later.
This post covers the essentials of setup and, more importantly, how to think about content modeling before you start creating types.
Getting Your Project Set Up
The initial setup process varies by platform, but the fundamentals are consistent across Contentful, Sanity, Strapi, and Payload:
- Create your project and environment. Most platforms support multiple environments — typically development, staging, and production. Set these up from the start. Making content model changes in production without a safe development environment to test in is a painful habit to break later.
- Generate your API keys. Your frontend will authenticate with the CMS using API tokens. Keep these in environment variables — never hardcoded in your codebase. Create separate read-only tokens for your frontend and keep admin tokens server-side only.
- Connect to your frontend. Most platforms have official SDKs for JavaScript and TypeScript, and community SDKs for other languages. Install the relevant package, point it at your API endpoint and token, and make a test query to confirm the connection before building out your content model.
These steps take minutes. The content modeling work that follows deserves considerably more thought.
What Is Content Modeling?
Content modeling is the process of defining the structure of your content — what types of content exist, what fields each type contains, and how different types relate to each other.
Think of it like designing a database schema, but one that non-technical editors will interact with daily. A content model that makes sense to a developer but confuses an editor creates friction and errors down the line.
In a headless CMS, your content model typically consists of:
- Content types (or collections) — the top-level categories of content, such as Blog Post, Author, Product, or Page
- Fields — the individual pieces of data within each type, such as title (text), body (rich text), publishedDate (date), or featuredImage (media)
- References — relationships between types, such as a Blog Post referencing an Author, or a Product belonging to a Category
How you define these, and how they relate to each other, shapes the entire data layer of your project.
Common Content Modeling Mistakes
Before getting into best practices, it’s worth naming the mistakes that show up most often in headless projects:
Treating content types like pages. A common trap is creating a “Home Page” content type, a “Contact Page” content type, and so on. This couples your content model to your site structure, making it inflexible and hard to reuse content elsewhere. Instead, model the content itself — a Hero Section, a Feature List, a Testimonial — and let the frontend decide where it appears.
Mixing layout with content. Fields like backgroundColor, columnCount, or paddingTop have no place in a CMS. These are presentation concerns that belong in your frontend components. If your content editors are controlling layout through the CMS, your model has drifted into territory that will cause problems.
Not planning for reuse. If you create a “Call to Action” as a field inside a Blog Post, and then need the same Call to Action on a Product page, you’ll be duplicating data. Reusable content should be its own content type that other types can reference.
Making fields too granular — or not granular enough. A single “content” rich text field that editors dump everything into is hard to query and render precisely. But splitting content into dozens of micro-fields creates an editing experience nobody wants. Find the right balance for your use case.
Modeling for Reusability
The most scalable content models are built around reusability. Rather than tying content tightly to a specific page or template, you define shared components that can be referenced wherever they’re needed.
A practical way to think about this: if a piece of content could appear in more than one place, it should be its own content type.
Some examples:
- Author — referenced by Blog Posts, Case Studies, and Podcast Episodes rather than duplicated in each
- SEO Metadata — a shared object type with title, description, and OG image fields, reused across every page type
- Call to Action — a standalone type with a heading, body text, button label, and link, reusable anywhere on the site
- Testimonial — its own type, referenced in product pages, landing pages, and a dedicated testimonials section
This approach keeps your content DRY (Don’t Repeat Yourself), makes updates easier — change an Author’s bio in one place and it updates everywhere — and gives your frontend components predictable, consistent data to work with.
Media and Asset Management
Every headless CMS includes an asset management system for images, videos, and documents. A few things worth knowing:
Most platforms store your media separately from your content and return a URL when you query a media field. Your frontend is responsible for rendering that URL — which also means you control image sizing, lazy loading, and format optimisation at the component level.
For image-heavy projects, consider pairing your CMS with a dedicated image CDN like Cloudinary or imgix. These services handle on-the-fly resizing, format conversion (WebP, AVIF), and delivery optimisation far better than most CMS asset pipelines on their own.
For video, avoid uploading large files directly to your CMS. Store video on a purpose-built platform — YouTube, Vimeo, or Mux — and reference the embed URL or video ID from your CMS content.
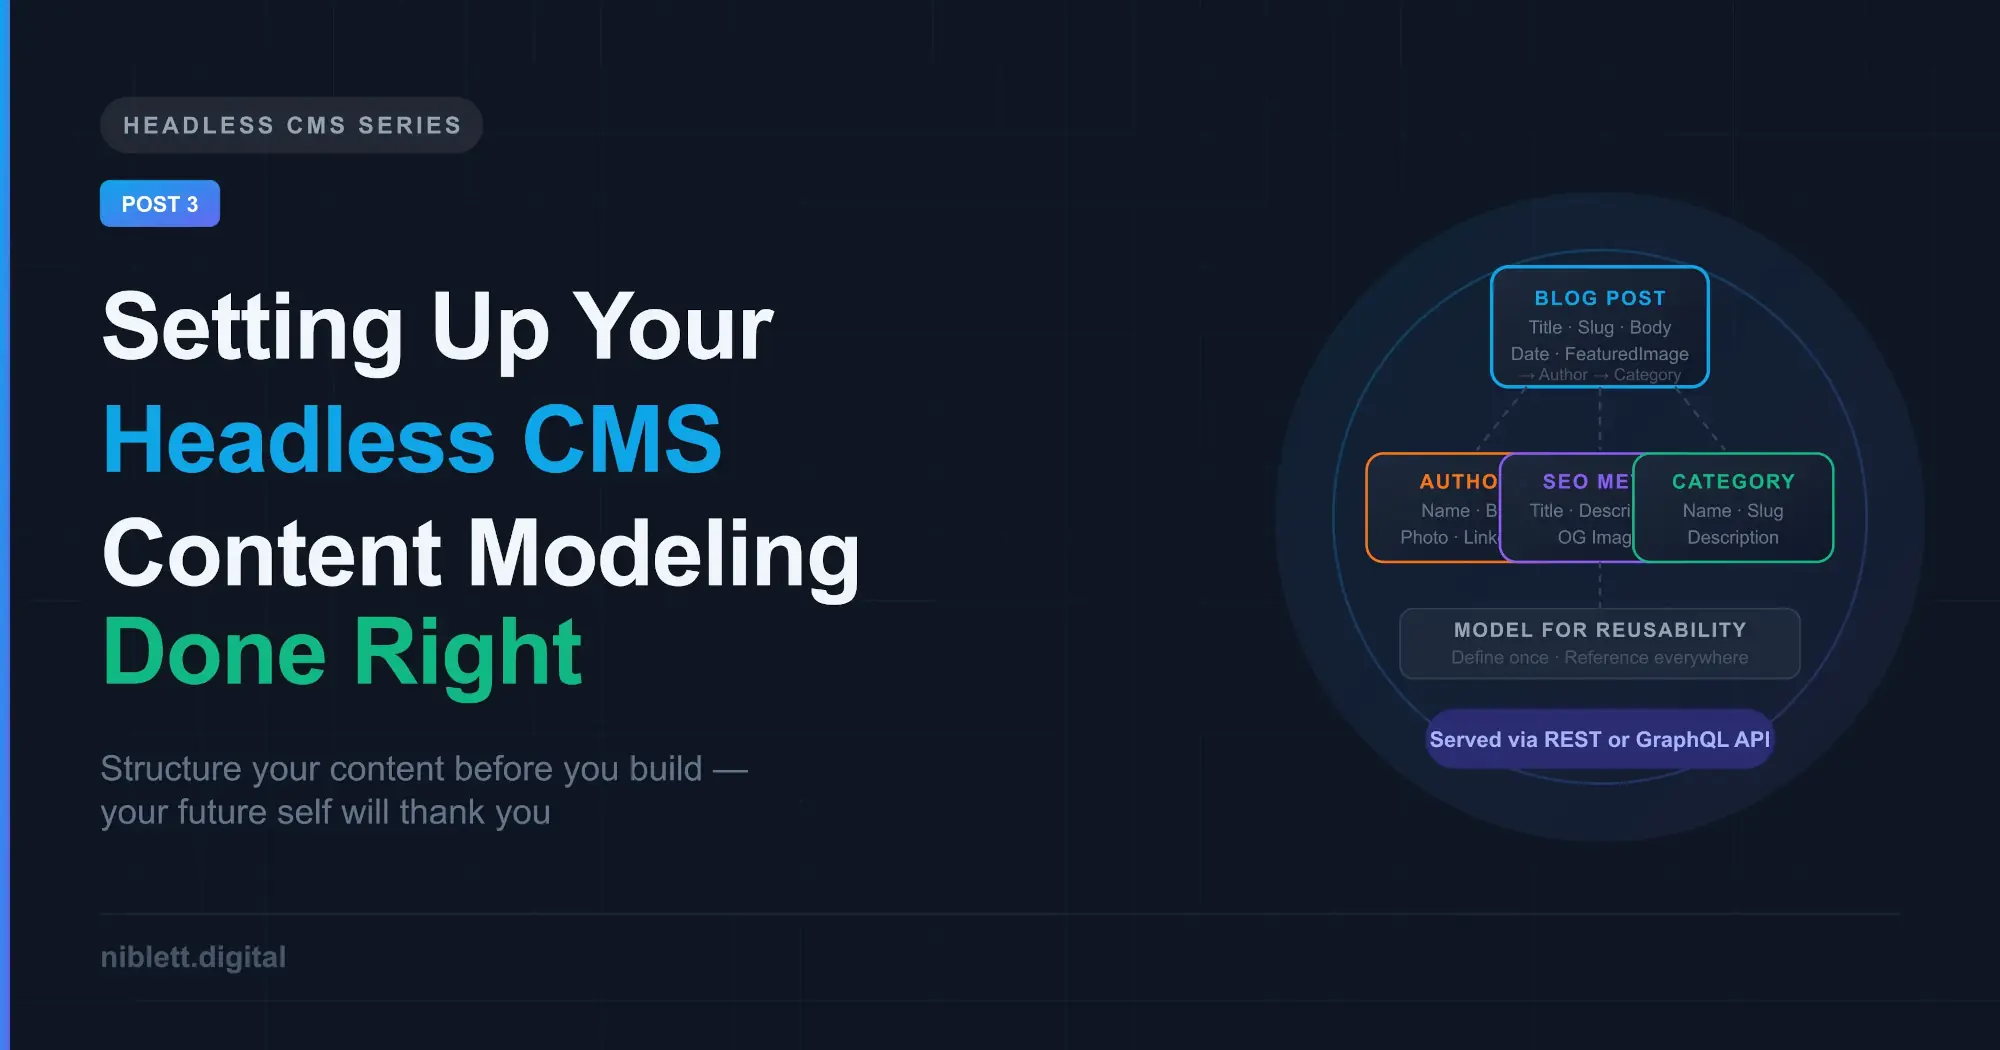
A Practical Example: A Blog with Authors and Categories
To make this concrete, here’s how a simple blog content model might look:
Author
- Name (text)
- Bio (text)
- Photo (media)
- LinkedIn URL (text)
Category
- Name (text)
- Slug (text)
- Description (text)
Blog Post
- Title (text)
- Slug (text)
- PublishedDate (date)
- FeaturedImage (media)
- Excerpt (text)
- Body (rich text)
- Author (reference → Author)
- Categories (reference → Category, multiple)
- SEOMetadata (component: title, description, OG image)
This model is clean, reusable, and queryable. An Author can be updated once and reflected across every post they’ve written. Categories can be listed, filtered, and linked independently. The SEO metadata is structured rather than buried in a free-text field.
It’s a simple example — real projects add complexity — but the principles scale.
What’s Next
With your CMS set up and your content model defined, the next step is connecting your frontend and actually pulling content into your application. In Part 4, we’ll walk through how to fetch content from your headless CMS using a modern frontend framework, handle media correctly, and structure your components around your content model.
This is Part 3 of a 5-part series on building with a Headless CMS.

